

How To Install Flutter in Windows 11 With Android Studio


This is the complete step-by-step guide to installing Flutter in our computer. So, to install Flutter in your computer you need the following things.
Step 1 — Installing Flutter SDK
First of all, you need flutter sdk which we will install from the official docs of flutter itself then you need an Android studio setup if you are in Windows and finally, you need a code editor but it is optional. Because you can use android studio for writing your code as well. But As many people use visual studio code so, we are going to do the same. And once we install all these things then we can easily create our flutter projects from anywhere inside our computer and test them as well using Android emulators.
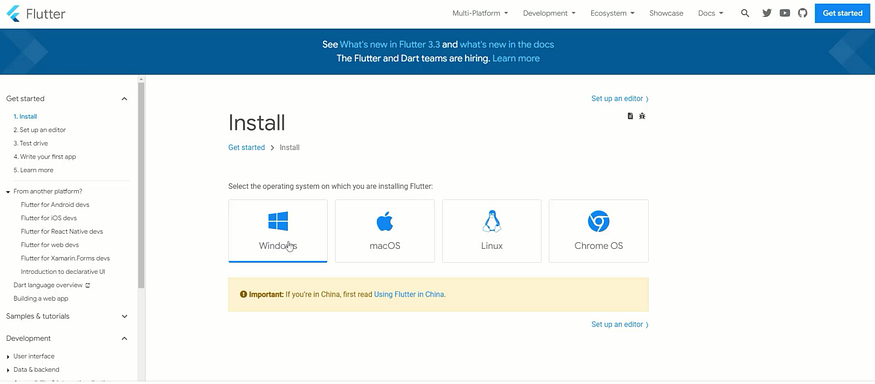
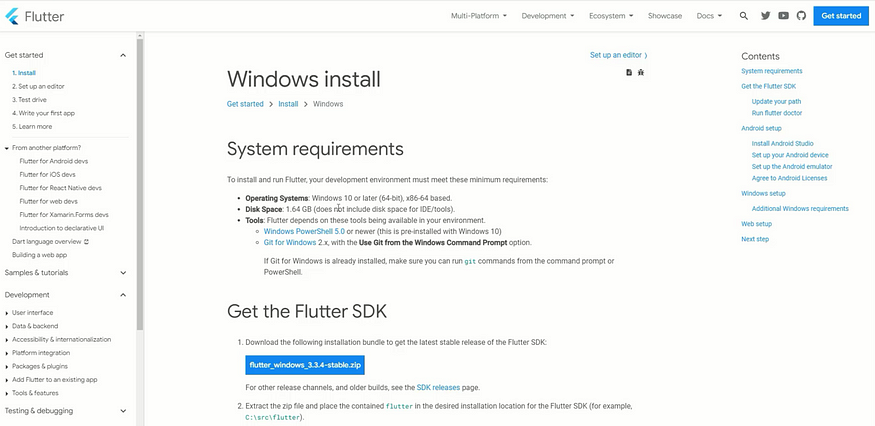
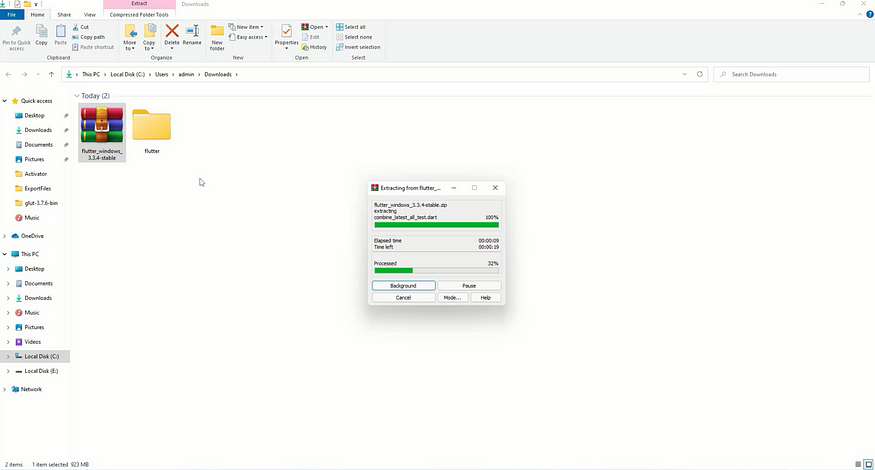
So, let’s get started by installing Flutter sdk first. For that let’s open your favorite browser I have Chrome so, in the URL bar just search Flutter installation click the first link after ad link and it will take you to the official documentation of Flutter here you can download and use Flutter for mac, Linux and other operating systems. But as I am on Windows so, I will click on Windows Now, here I will install the Flutter sdk which is the latest version by clicking on the big blue button, you can also look at the system requirements as well now there you go my download has been started, just wait for the download to complete and once the download finishes. Just go to the download location and extract the files.
Now, if you don’t see the extract option then for that you can use WinRAR which is a free tool that is used to zip and unzip files in Windows. Now, as you can see the extraction has been completed.
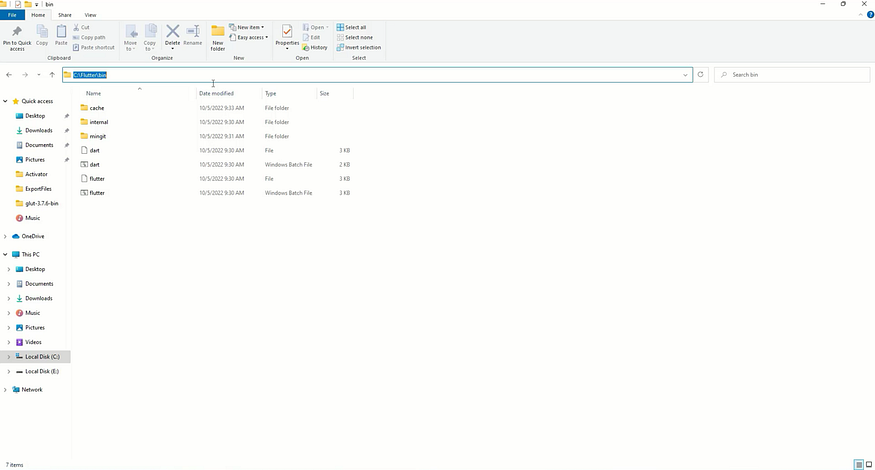
Now I will move my Flutter folder from downloads to my c drive. Again it is optional. Let’s create a new folder named flutter and inside this folder, I will paste my files now we have a flutter directory and inside that we have the flutter folder that we have just moved and let’s cut all the files from the flutter directory and let’s paste them inside the parent directory and let’s delete the empty flutter folder. So, now it looks nice basically what we have done is that we have created a flutter directory inside c drive and we have pasted all the files that have been extracted from flutter sdk inside this.

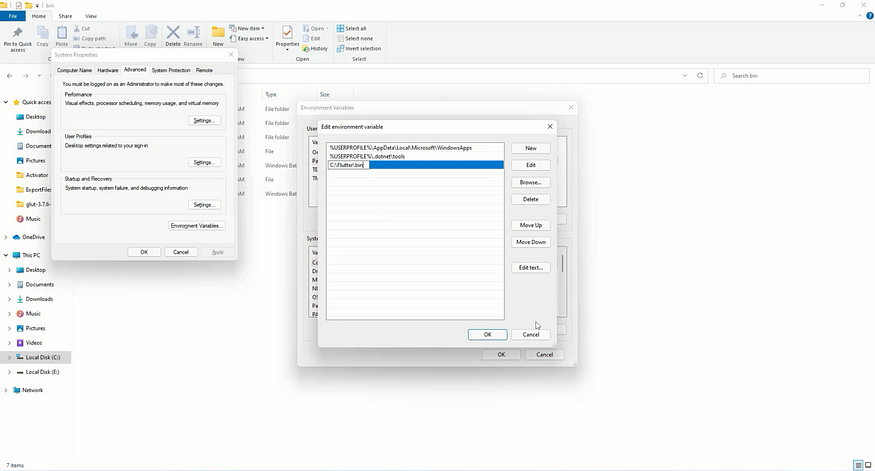
And now in order to run flutter commands from anywhere inside your computer you need to add this bin folder to your environment variables. So, for that let’s copy the URL to the bin folder and now let’s go to the environment variables by searching env from the search bar of your windows by clicking the first recommendation it will simply open the environment variable settings now here click on environment variables and under user variables click on the path, edit, new and simply paste the URL that you have copied. After that just click on ok to cancel all the windows.
Steps To Install Flutter Image 5
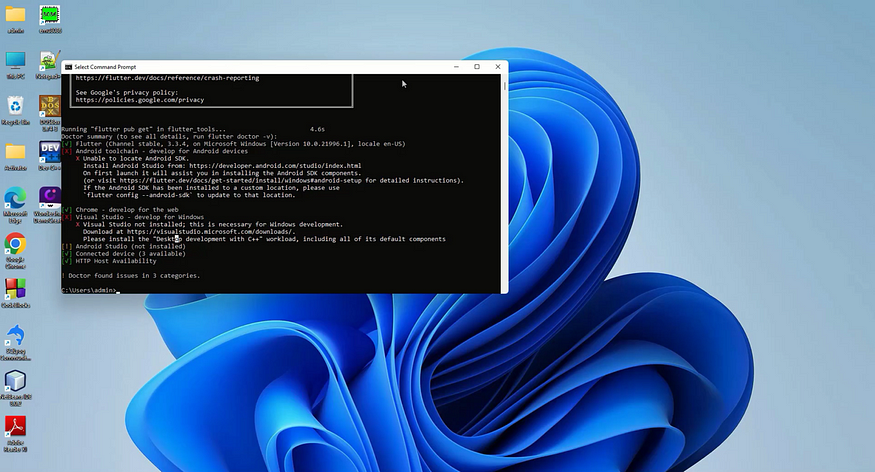
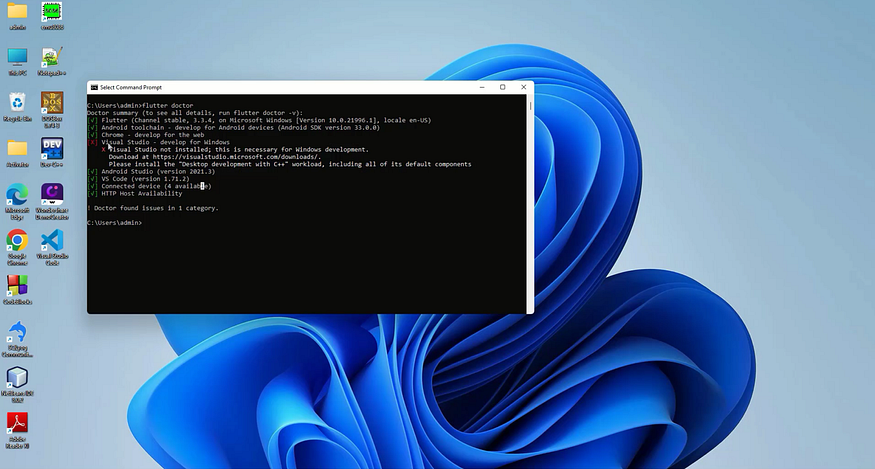
Now, you can use flutter commands from anywhere on your computer. Let’s test it out so, let’s open cmd and here just write the command as flutter doctor.
This is a command that will tell you whether everything is ok or not. So, as you can see it has many red marks which we need to fix. So, we have successfully installed Flutter sdk in our computer.
Step 2 — Setting Up Android Studio
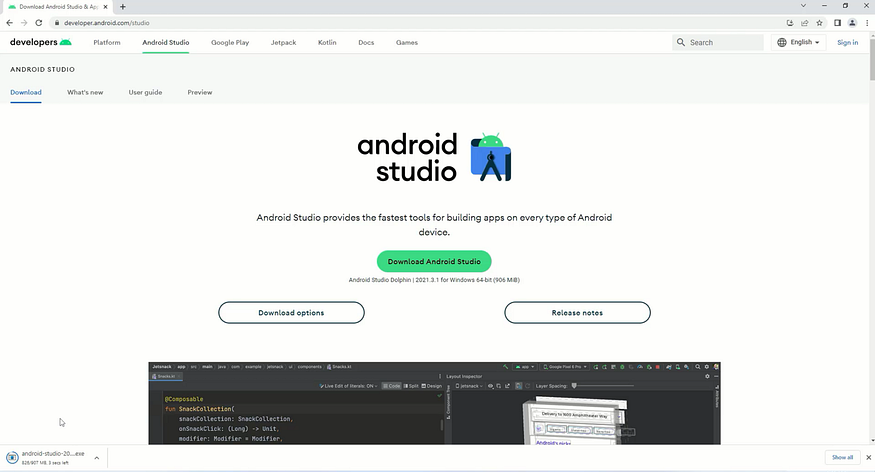
Next, we need to install android studio so, just open your browser once again and this time search for android studio install click the link that will take you to developers.android.com and there just download android studio. Now it might ask you for accepting their terms. And Once the download finishes go to the download location and double-click the setup to install android studio. Now, I will install android studio the steps are very easy. And once the installation completes the Android studio will start automatically.
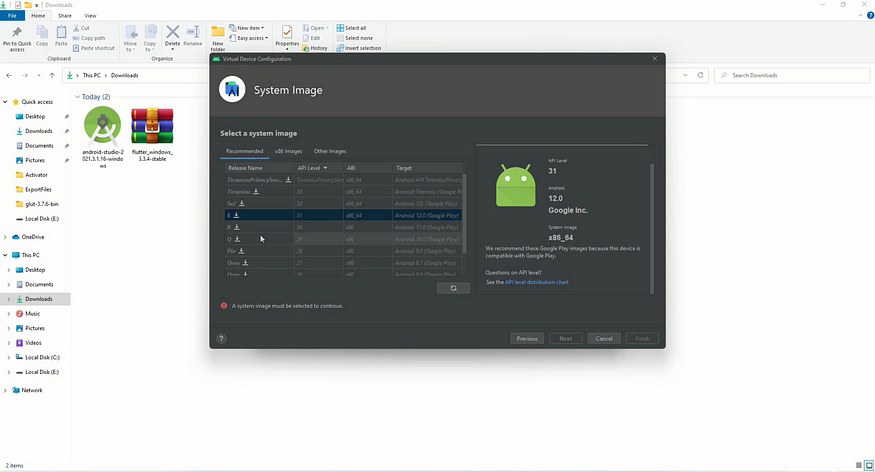
Now, here click next and go with the custom installation here i will check on the dark theme because i like darker themes now here i will choose the custom install type here you can note your Android sdk path. After that just accept the terms and click on finish to install the required components. Now, once the installation finishes just click on finish button. And make sure that in your sdk tools tab this component is also installed otherwise you might fall into issues. Next we need to create our android emulator which is basically a virtual phone which is used to test your flutter apps while you are developing. so, just click on AVD manager and there just create a new virtual device so, just follow along and once you are done then we can move ahead. So, as you can see that i have successfully created my emulator. And now, we have also installed android studio and created our virtual device as well.

Now, let’s run flutter doctor command from the cmd again and as you can see it has successfully connected to android studio.
And all the issues have been resolved except the only thing that is left is to accept the android licenses so, to fix this issue we need to run this command which is flutter doctor — android-licenses and here just press y to accept all the license and now if i run flutter doctor command again so, now there you can see that we have no more errors. And you can ignore this visual studio error because we don’t need that. Now, we have successfully completed our second step as well.
Step 3— Setting Up Visual Studio Code
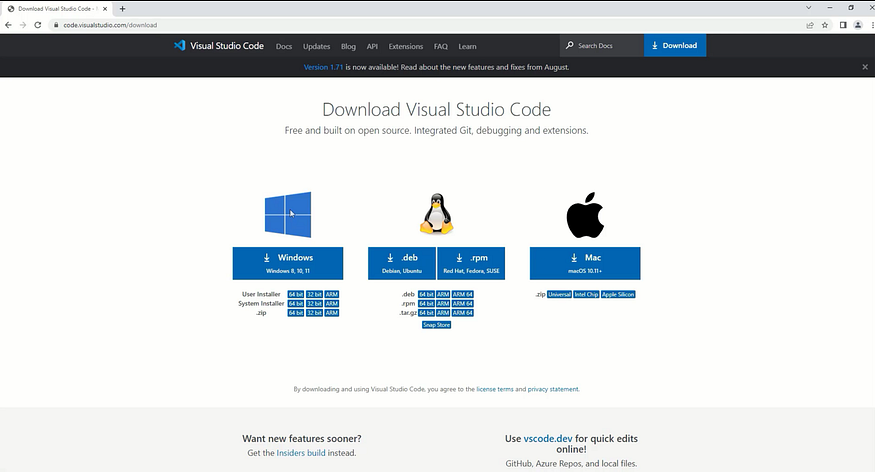
Now the last step is to install our visual studio code editor and setup our flutter environment for coding. So, once again just open your browser and this time search for vscode install click the first link and there just install vscode for your operating system i am on windows so, i will download the windows version of vscode.
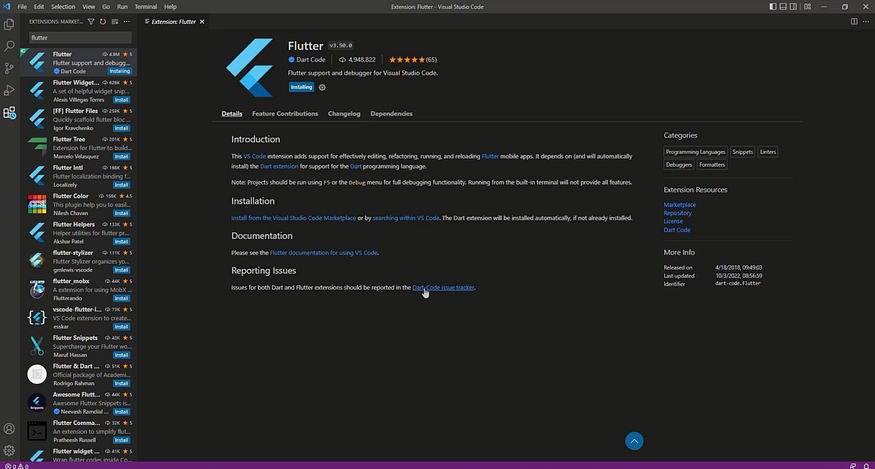
Once the download finishes just go to the download location and double click on the installer. And here make sure to check mark all the options because they will help you alot in the future. Now, once the installation finishes just launch your vscode editor to create our very first flutter project. But before we start let’s download some extensions that are very popular and help you to create your flutter projects superfast and easier. So, in the extensions tab search for flutter and install the very first recommendation. Now, it will also install dart extension with flutter. So, with these two extensions you are ready to create your flutter apps in vscode.
Step 4— Creating Our First Flutter Application
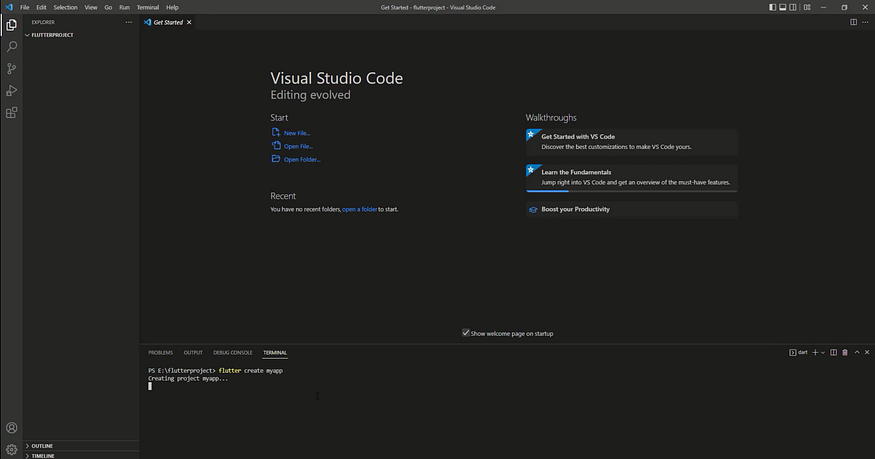
So, my extensions are ready and now it’s time to create our very first flutter application. For that just create a folder inside your computer I will create a folder in my e drive and let’s name it flutter project and now I will import my folder inside vscode and inorder to create a flutter project let’ open the terminal inside vscode you can use ctrl + ` to open a terminal inside vscode or you can click on terminal and new terminal to open a fresh terminal within the editor and to create a flutter project first of all make sure you are in the correct directory and now you need to type a command as flutter create and the name of your project i will name it myapp and after that just hit enter. Now, it will create a brand new flutter app for you.
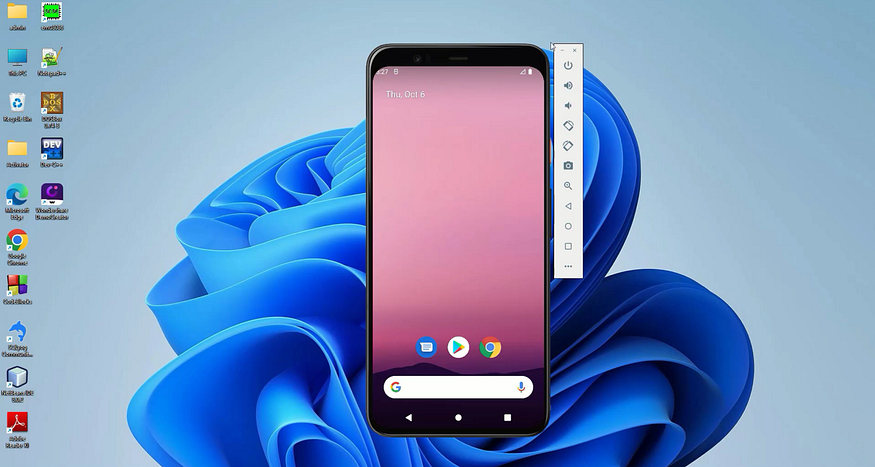
So, as you can see i have got all the files and basic structure of flutter inside myapp folder and now it is the time to run our very first flutter application. Now, for that we need to run a command called flutter run and this will open our flutter app on android emulator that we have just created using android studio. Now, if you have multiple devices maybe you can use your physical device so, in that case you can run a command called flutter devices and then select a particular one from the choices to run your flutter app on a specific device. But in my case I have my emulator so, i don’t need that. So, congratulation you have your very first flutter application created.
Now, if you want to make some changes in the code you can refer main.dart file under lib folder. But before that i want to introduce the flutter extension inorder to run your app.
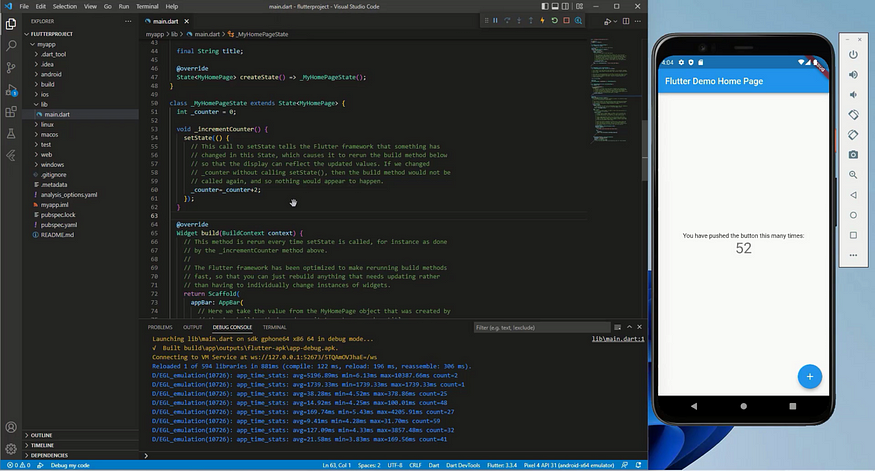
so, let’s just break the current app and let’s click on run without debugging from the run menu of you editor and it will run your flutter app in a more controlled way. You will find a nice controller at the top. And now let’s change the incrementing behavior to let’s say 2 times and now, as soon as I save my code my app get’s updated and as you can see the value is also incrementing by two. Now, you can control the running of your app you can click on the yellow button to hot reload your app and red button to stop your app and there are a lot more options that you can use.
Conclusion
So, guys that sit for this post, we have learned how to install flutter in windows. I hope you find this post helpful. Always remember this key point in your journey of development. If you have a business and need a reliable hosting then check out Hostinger . today. For freelancing or hiring,check out fiver instead. If you have any queries or need any dev services contact me at shahriarshahin2206@gmail.com
Keep Learning, and Keep Exploring!